
Record your screen.
Edit the recording.
Record a screen or window, cut the parts you do not need, and save the video on your computer. Use a microphone or webcam when it helps explain what you are doing.
 A closer look at Kliper Studio ↓
From recording to finished video.
Choose a source, make your edits, and save a video. Here is what each step looks like.
Check your screen and sound.
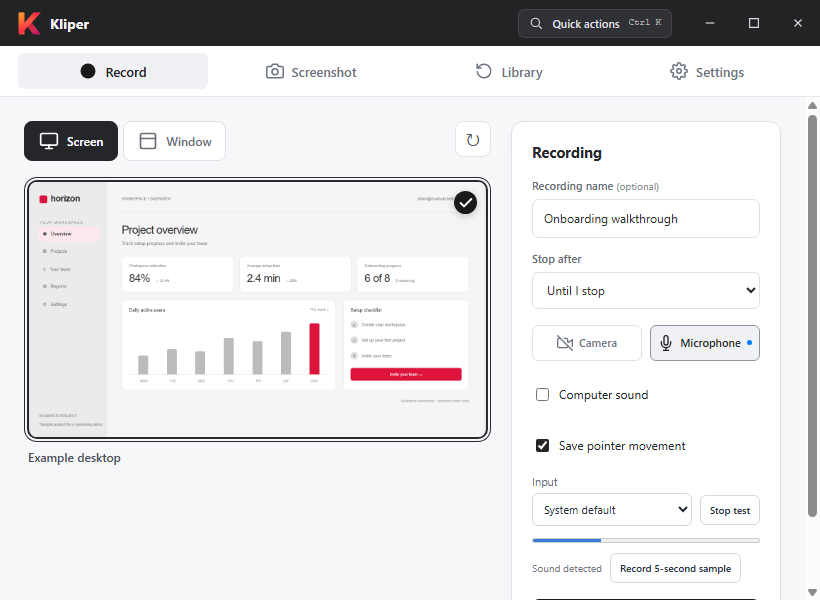
Select a screen or window. Turn on your microphone or camera if you need them. Windows can also record computer sound. Add a name or stop timer, or start recording right away.
- Screen and window selection
- Optional microphone, webcam, and stop timer
- Separate microphone and computer audio on Windows
- Recover unfinished recordings after restarting
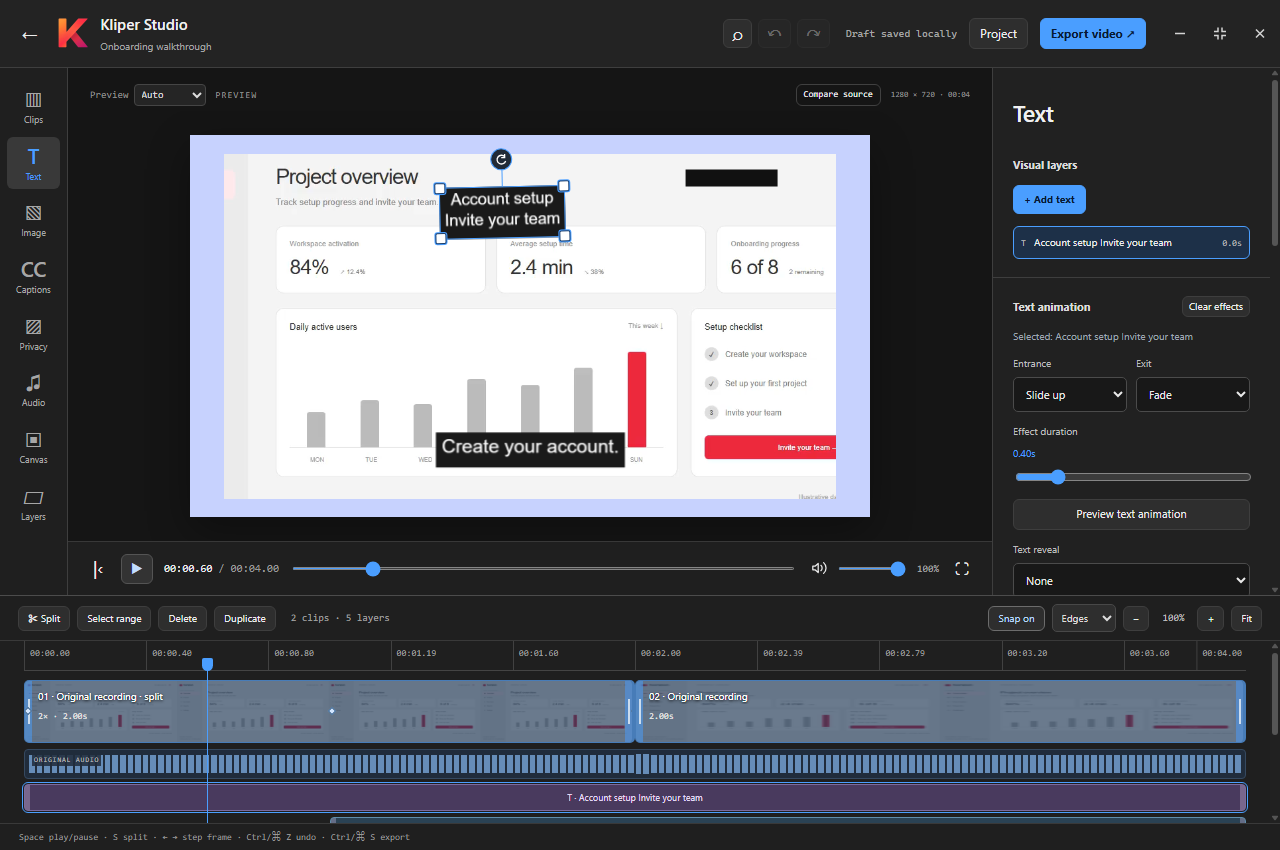
Combine clips and remove unwanted sections.
Add another video, arrange your clips, and remove the sections viewers do not need. Put text or captions where they help explain the screen.
- Drag text and images to move, resize, or rotate them
- Generate captions on your computer and correct the words
- Turn saved pointer movement into editable zooms
- Save an editable project and copy its media
Find a recording without opening every file.
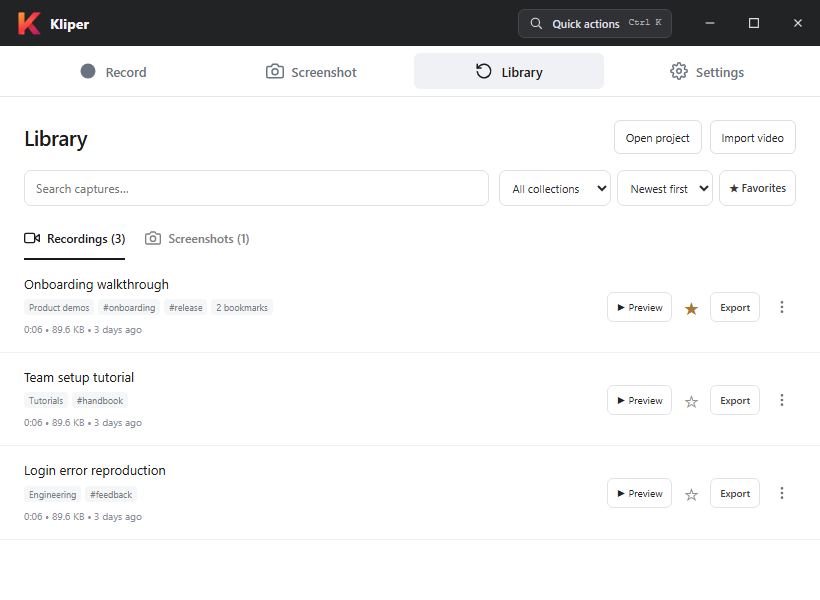
Search names, notes, tags, and bookmark names. Use collections and favorites to organize recordings and screenshots. Import and preview existing videos here too.
- Search, filters, and sorting
- Editable names, notes, tags, and collections
- Open bookmarks, preview videos, or reopen editable projects
Export a video or GIF.
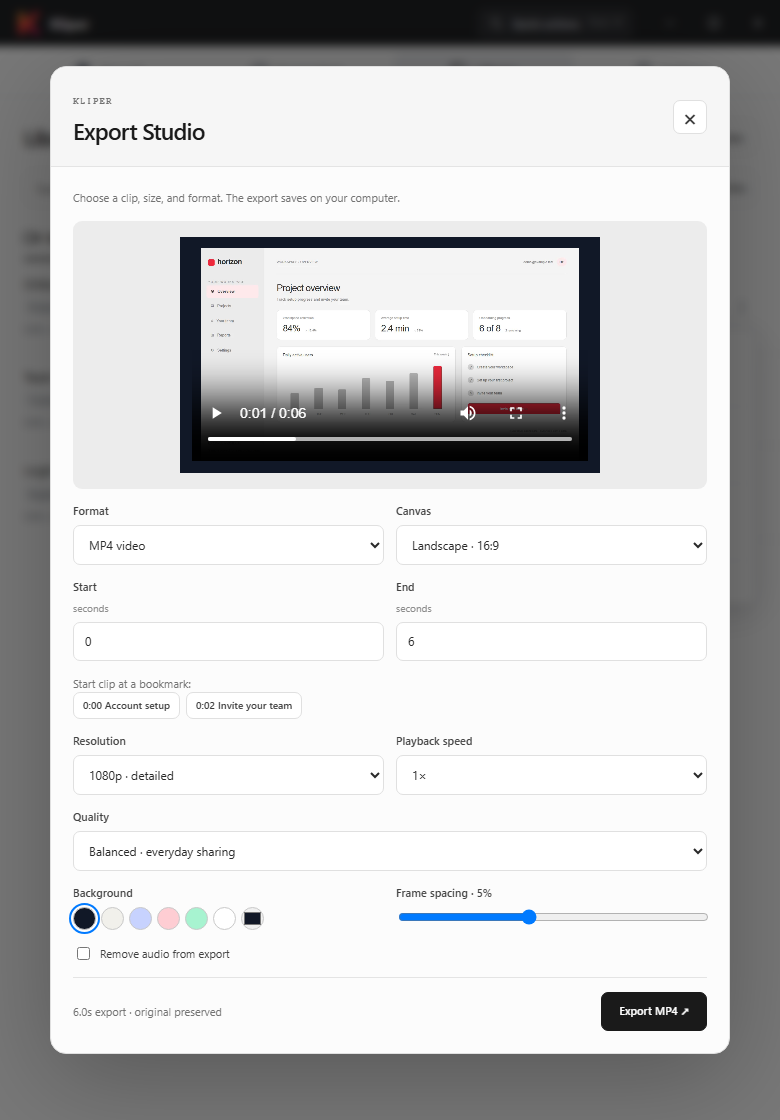
Choose a section of your recording, its speed, and an export size. Set the background, spacing, and quality, then save a new file.
- Original, landscape, portrait, or square sizes
- Video preview and MP4 or silent GIF output
- Progress display and export cancellation
See the recording and editing tools in use.
Follow a sample project through captions, cursor zooms, project saving, and MP4 export.
Kliper walkthrough · 1:47
Jump to a step
Recorded in the app with a sample dashboard, narration, and pointer path. Project saving, caption generation, and video export run in Kliper.
Read the walkthrough transcript
Choose a screen or window. Check the microphone, then name the recording so you can find it later. Open a saved recording from the library. Your videos and editing projects stay on your computer. Trim the beginning and end. Drag a handle for a quick cut, or enter the exact source times. Add a title and change the wording. Text stays editable, with handles for its size and position. Cover information you do not want to share. Use a solid redaction, and check its position throughout the video. Generate captions on your computer after setting up the speech tools. Choose the language, then review the transcript. Add the captions to the timeline and correct any mistakes. Check names and timing before exporting. Use saved pointer movement to create zooms and click highlights. The zoom keyframes remain editable. Use the Audio controls to change the exported sound level. The speaker slider only changes listening volume while editing. Choose a canvas for the finished video. Check that your text and important details remain easy to read. Save the project when you want to change the edit later. Copy its media to move it to another computer. Export a new MP4 and keep the original recording. Kliper saves the finished video with your text, captions, and zooms. Watch the saved video before sharing it. Keep the project and original files if you expect to make another version.
A recording, before and after editing.
Compare the original sample recording with an actual Kliper export. The edit adds text, captions, a privacy mask, and a frame.
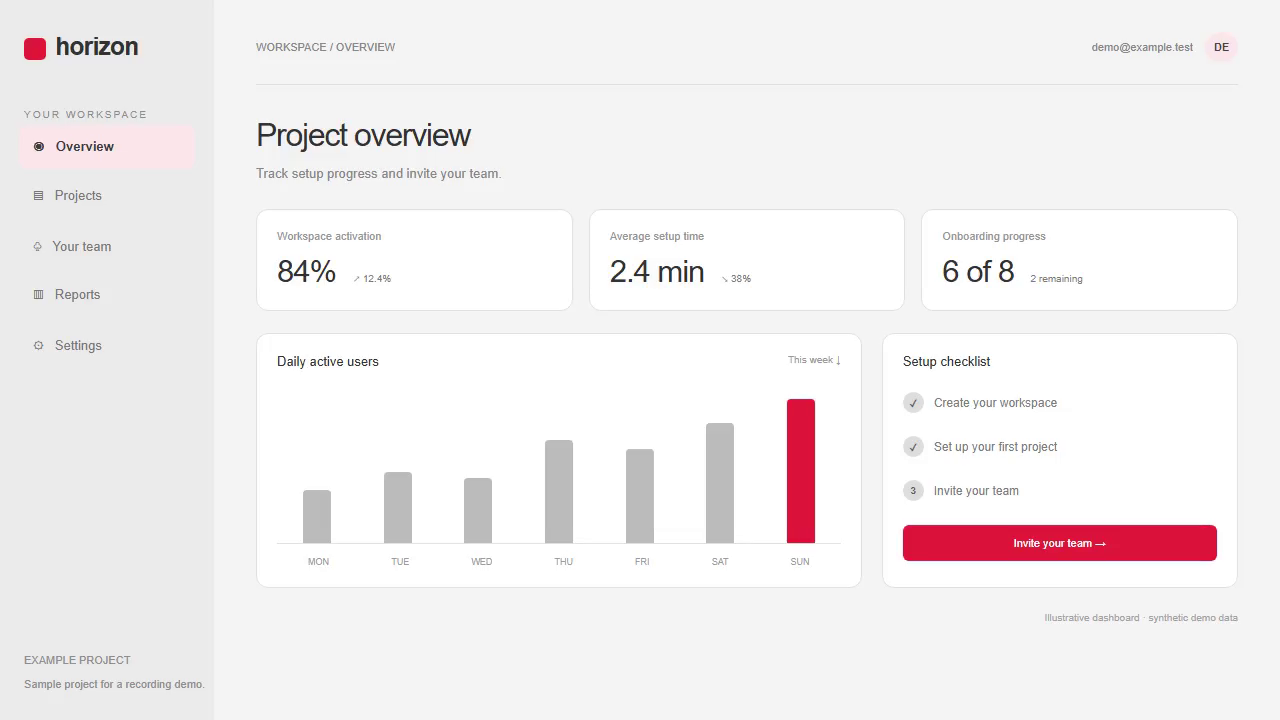
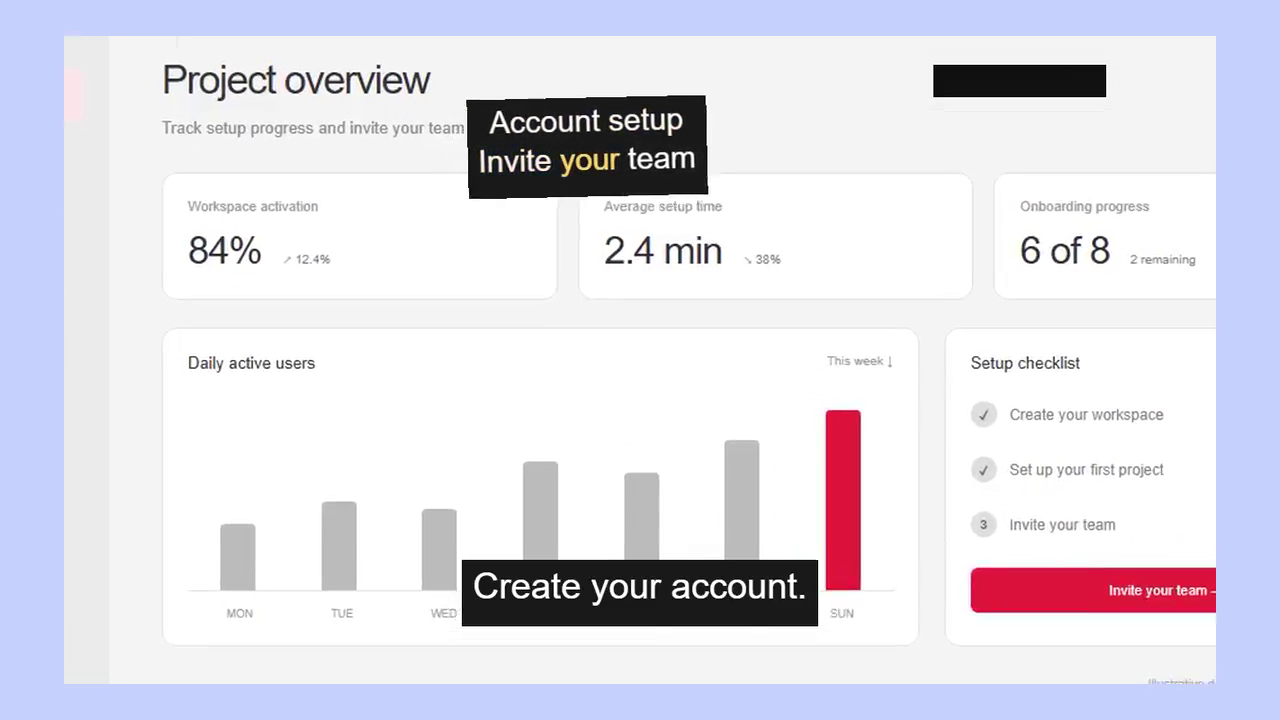 Edited in Kliper
Show a small detail
Set zoom and focus at two moments, or generate editable zooms from pointer movement saved during recording.
Remove a section
Mark a range to keep or remove. Captions, layers, and imported audio follow the cut.
Return to the same edit
Resume saved drafts in Settings. Save a .kliper project and its media to move it to another computer.
Record, edit, and save.
Record your screen
Record a screen or window with your microphone and optional webcam. You can also capture a screen, window, or region screenshot.
Edit your recording
Select and reorder several clips, cut a marked section, animate zoom and movement, add captions, redact private details, and mix your audio in Kliper Studio. Save editable .kliper projects. Copy their media when you want to move or back them up.
Export or upload
Export a framed MP4 or a short, silent GIF locally. With Pro, upload to your own YouTube or Google Drive account when you choose. Uploads are optional.
See the app up close.
Screens from Kliper 5.0.0 with sample recordings. Select a screenshot to enlarge it.
Recording controls
Choose a source, microphone, and Windows computer sound. Set an optional name and stop timer.
Video editor
Trim clips and use mouse handles to move, resize, and rotate text or images.
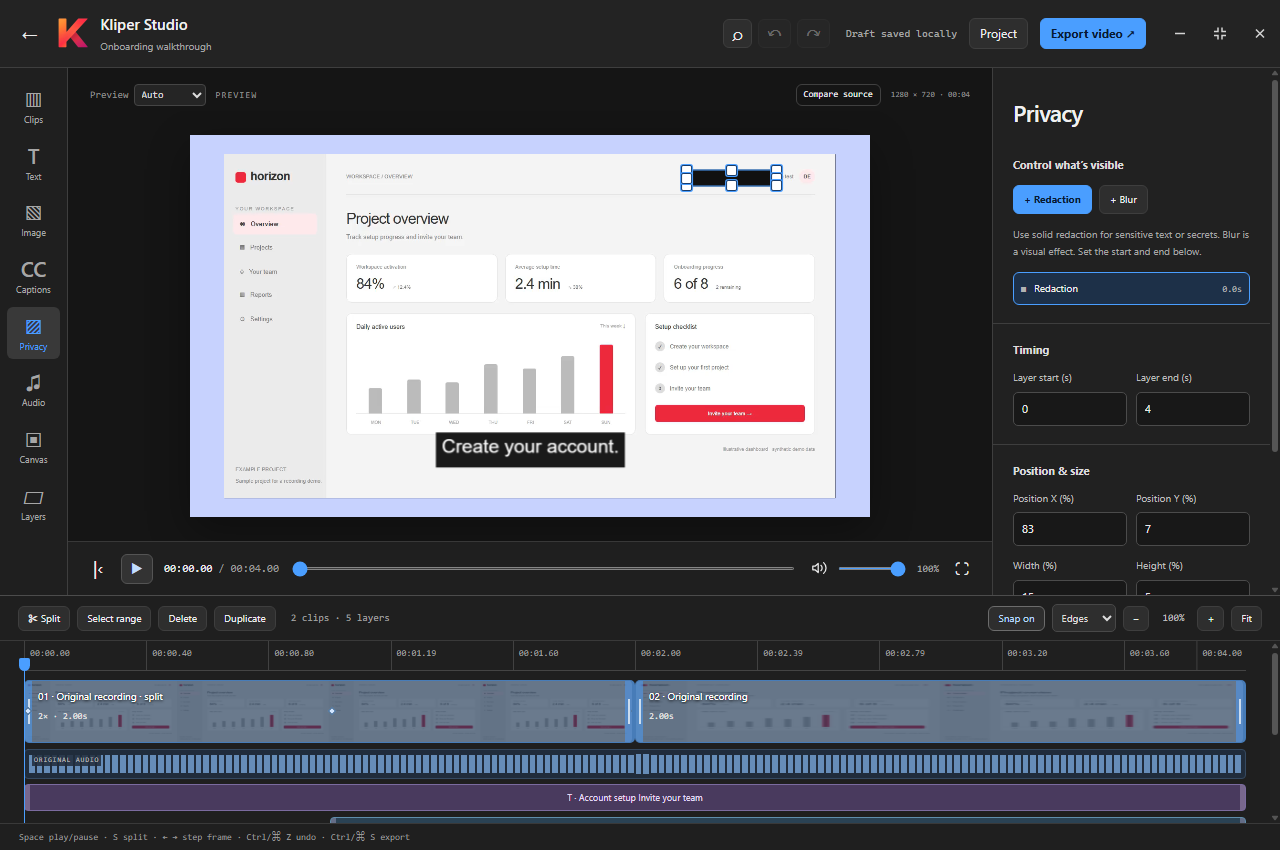
Privacy masks
Add solid redactions or blur with a position and start/end time.
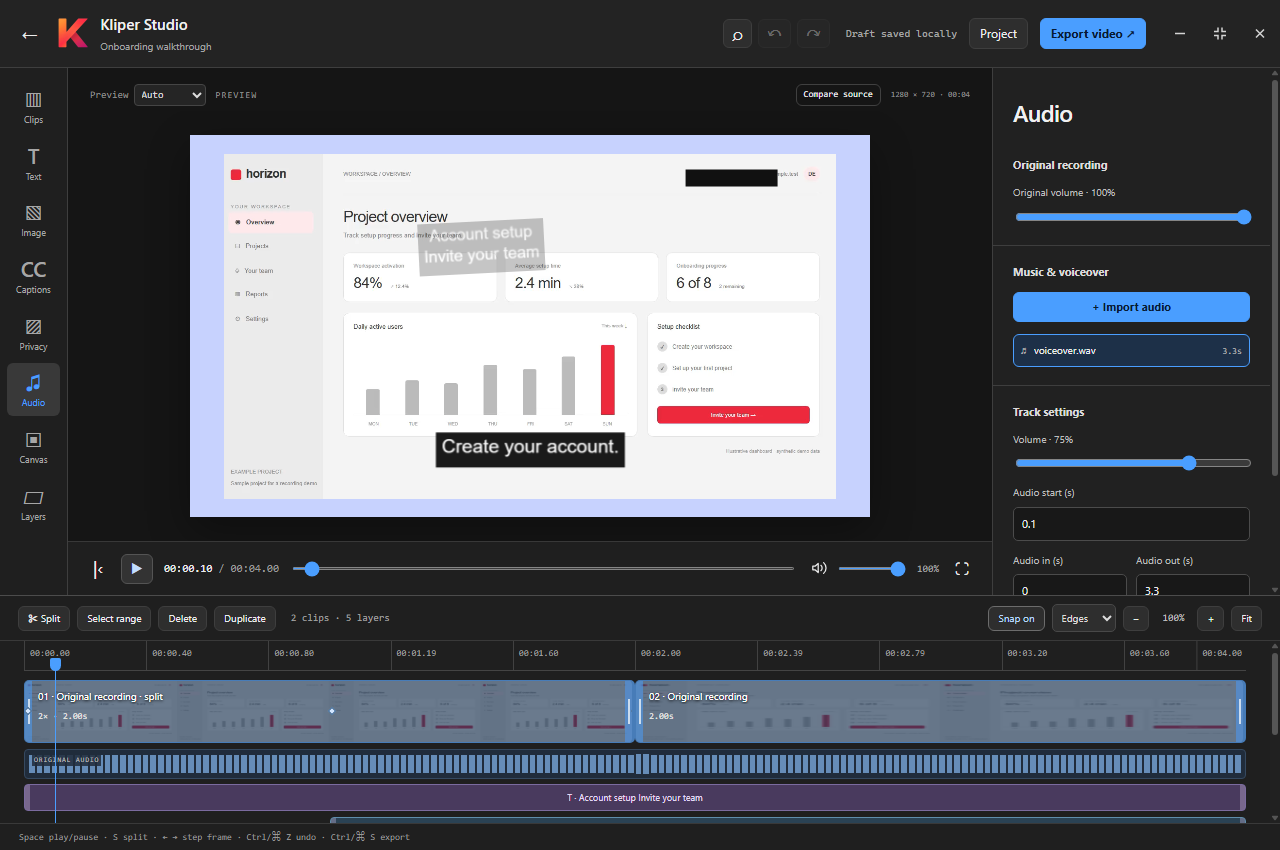
Audio controls
Mix original and imported audio with volume, trim, and fade controls.
MP4 and GIF export
Preview a section of your recording and export a new file.
Saved captures
Search recordings and screenshots by name, tags, notes, and bookmarks.
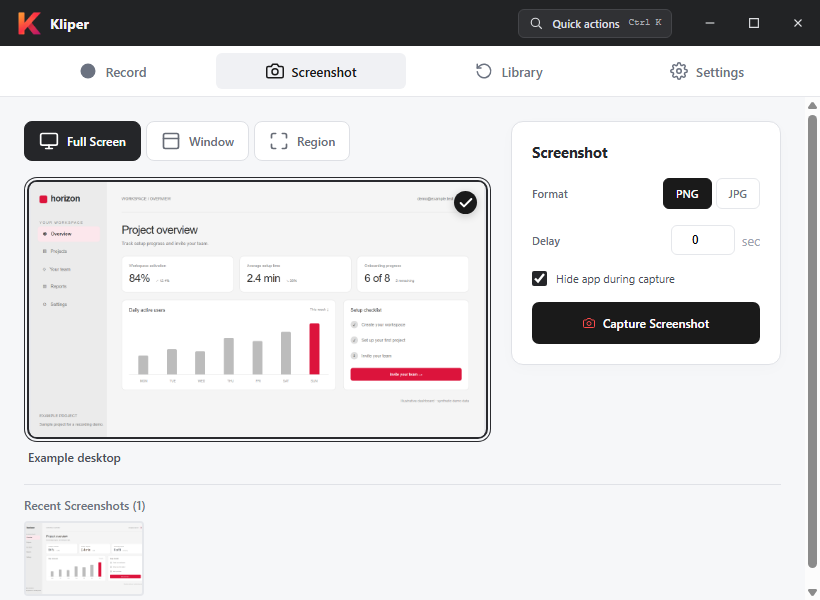
Screenshot controls
Choose a screen, window, or region with format and delay controls.
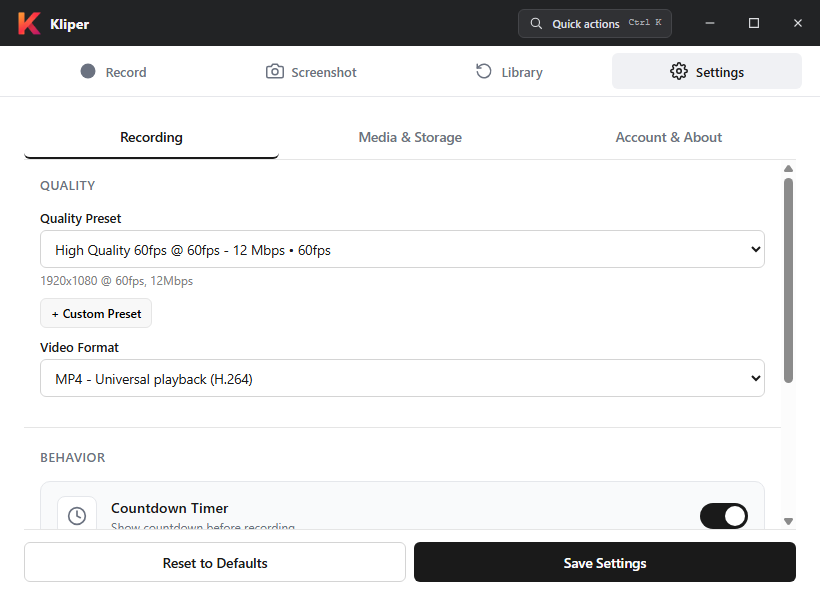
Recording settings
Choose recording quality, format, audio, and storage preferences.
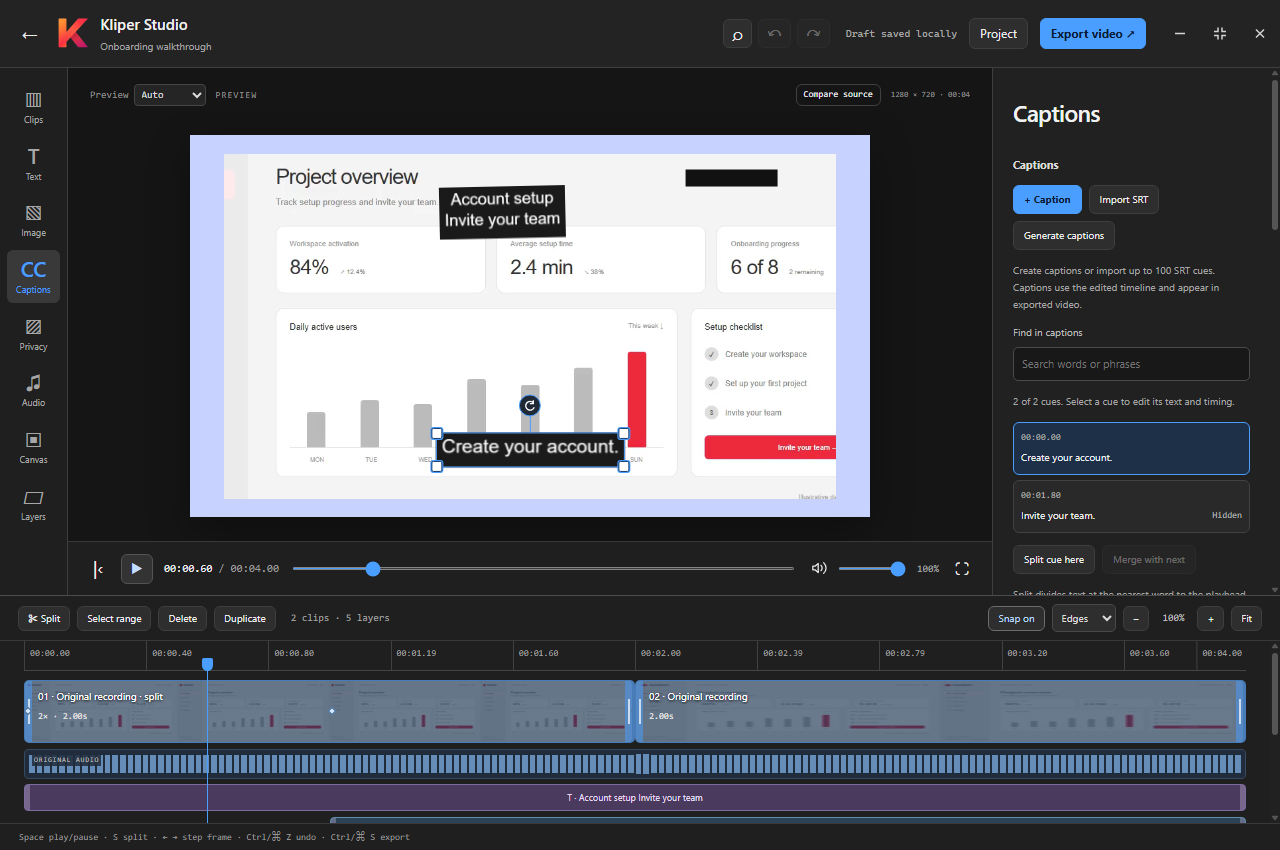
Caption editing
Search captions, split a cue at the playhead, or merge it with the next cue.
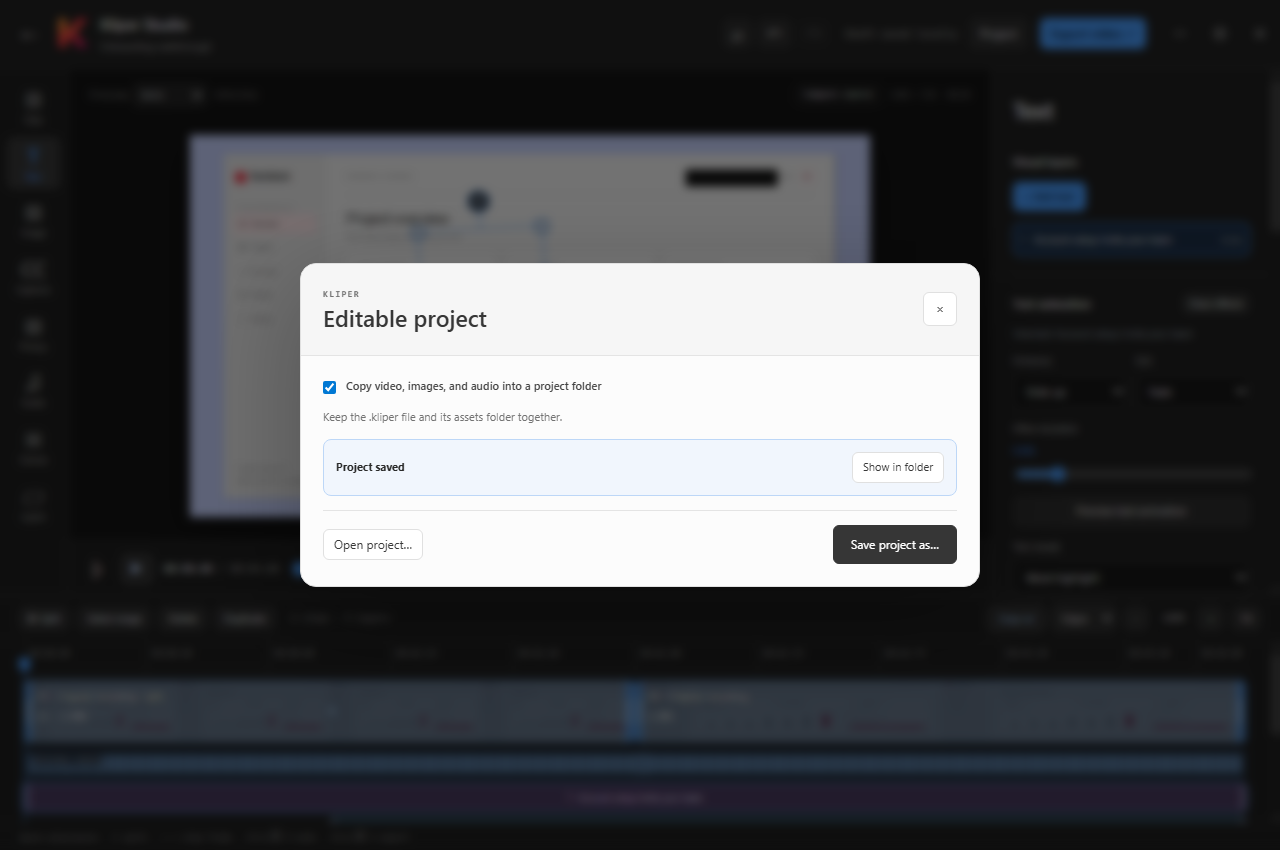
Editable projects
Save edits as a .kliper project, with an optional copy of the video and imported media.
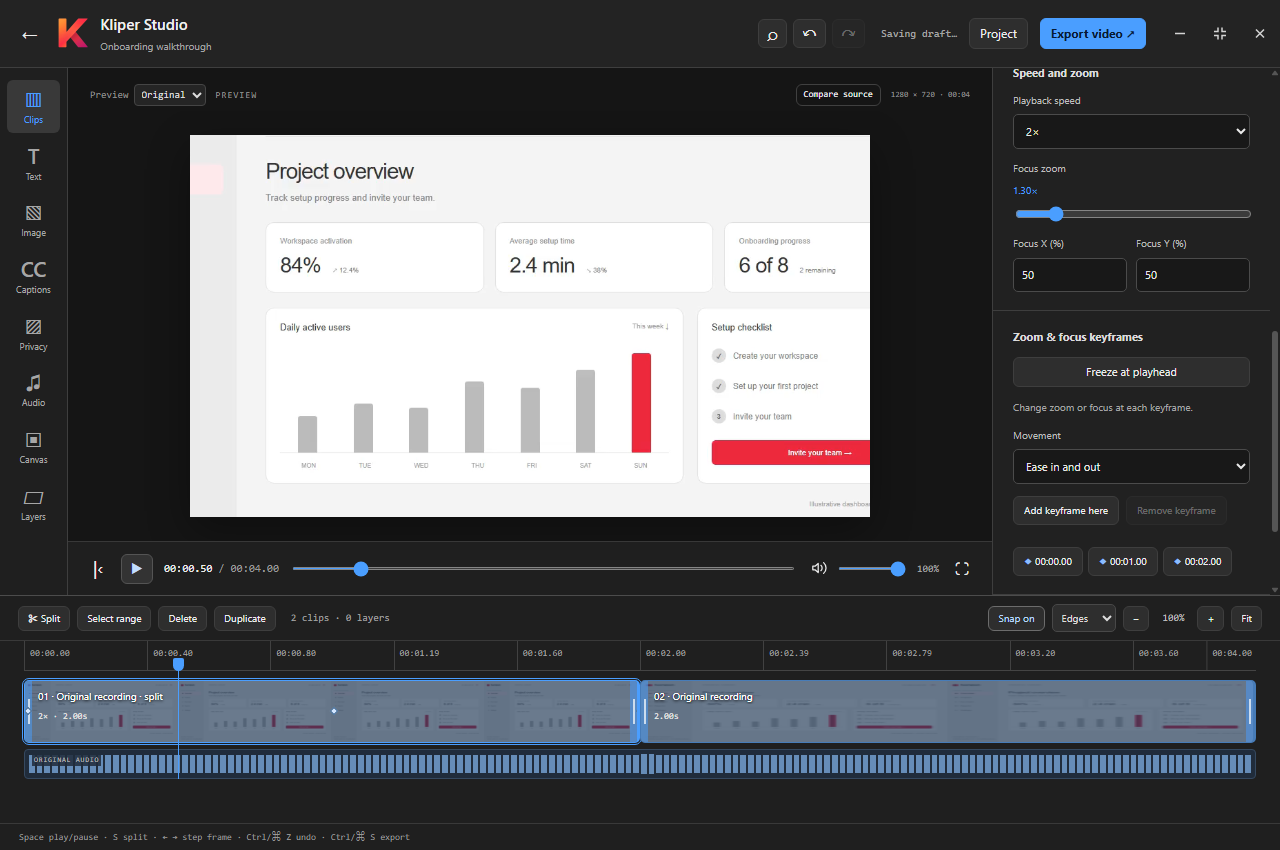
Animated zoom and movement
Set keyframes for clip zoom and focus, or move and rotate text and images over time.
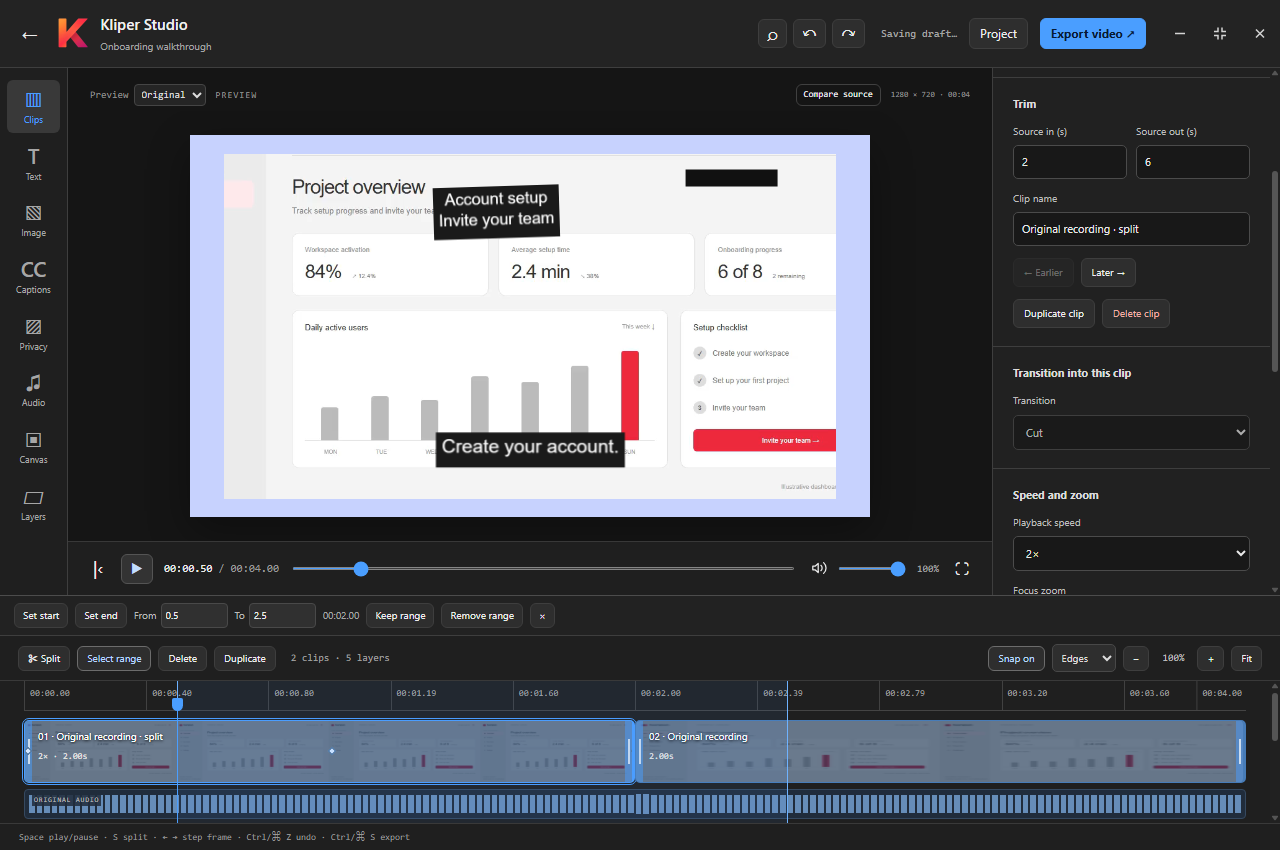
Timeline range editing
Mark a section to keep or remove. Captions, layers, and imported audio follow the cut.
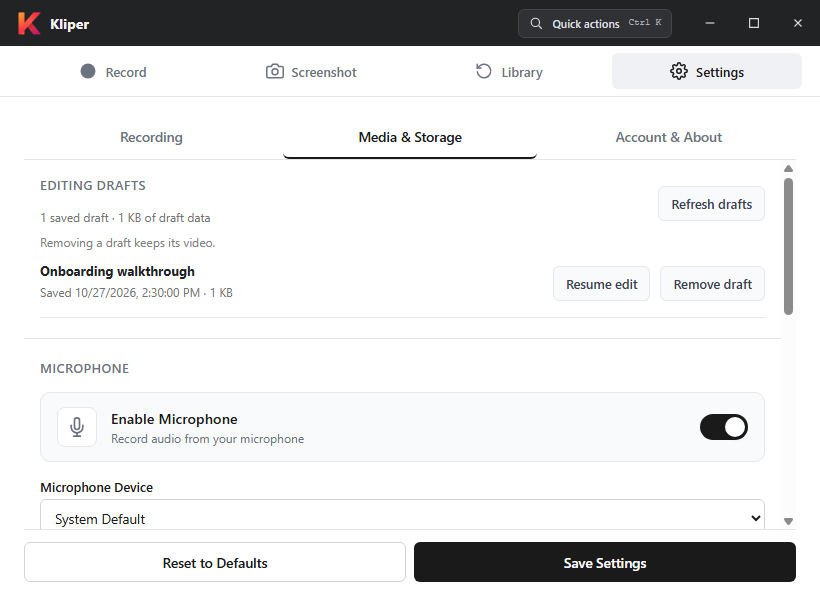
Saved editing drafts
Resume an edit in Settings, remove saved draft data, or undo a removal.
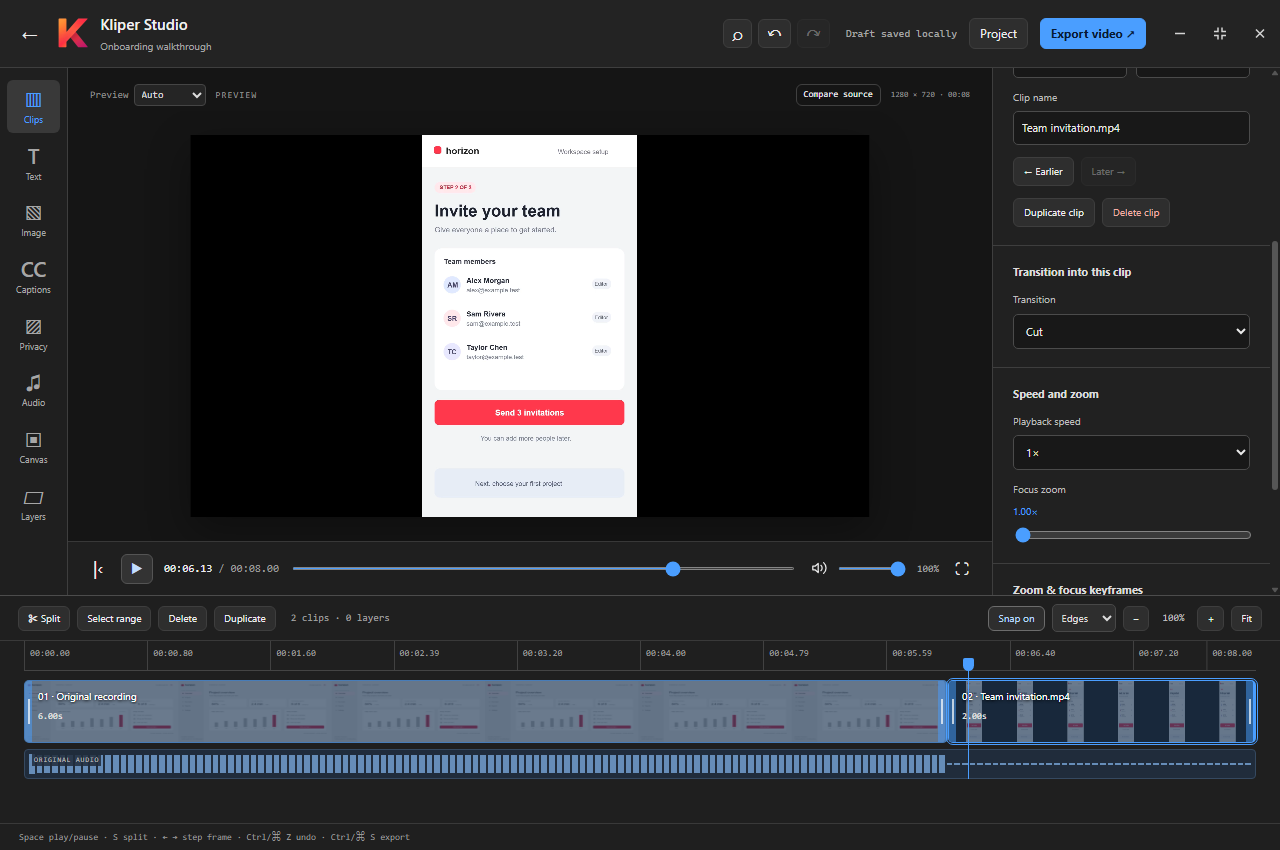
Multiple video files
Combine videos on one timeline. Each clip keeps its own trim range, speed, and sound.
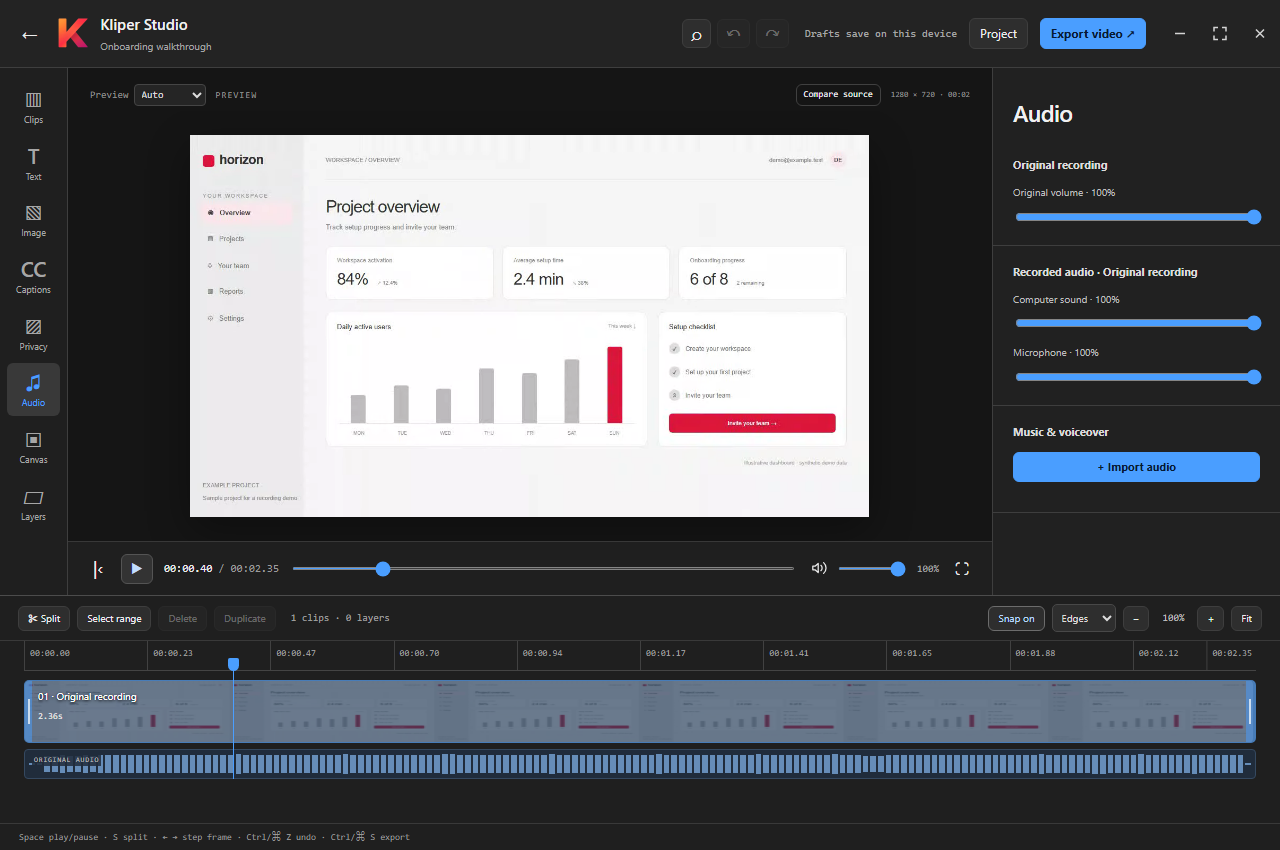
Separate recorded audio
Record microphone and computer sound on Windows, then adjust their levels separately in Studio.
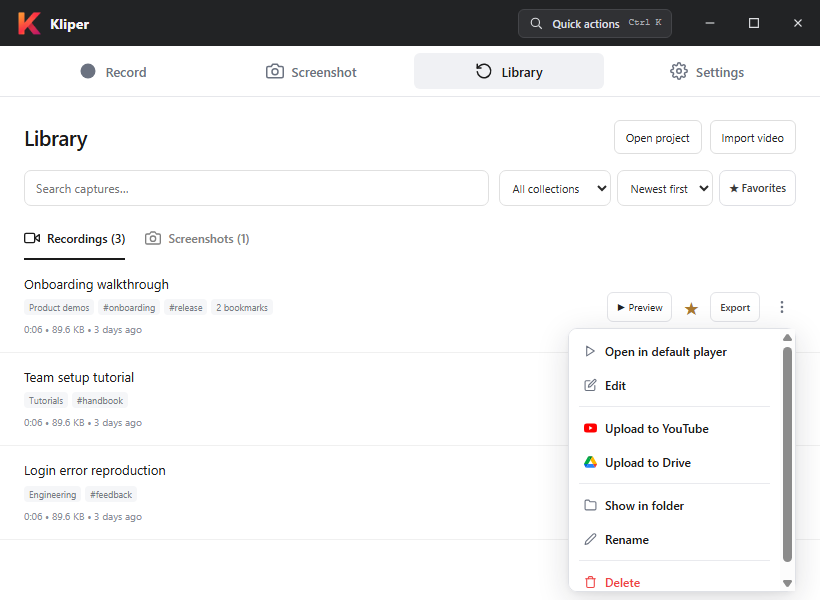
Capture actions
Open the selected capture’s actions, with menus that stay inside the window.
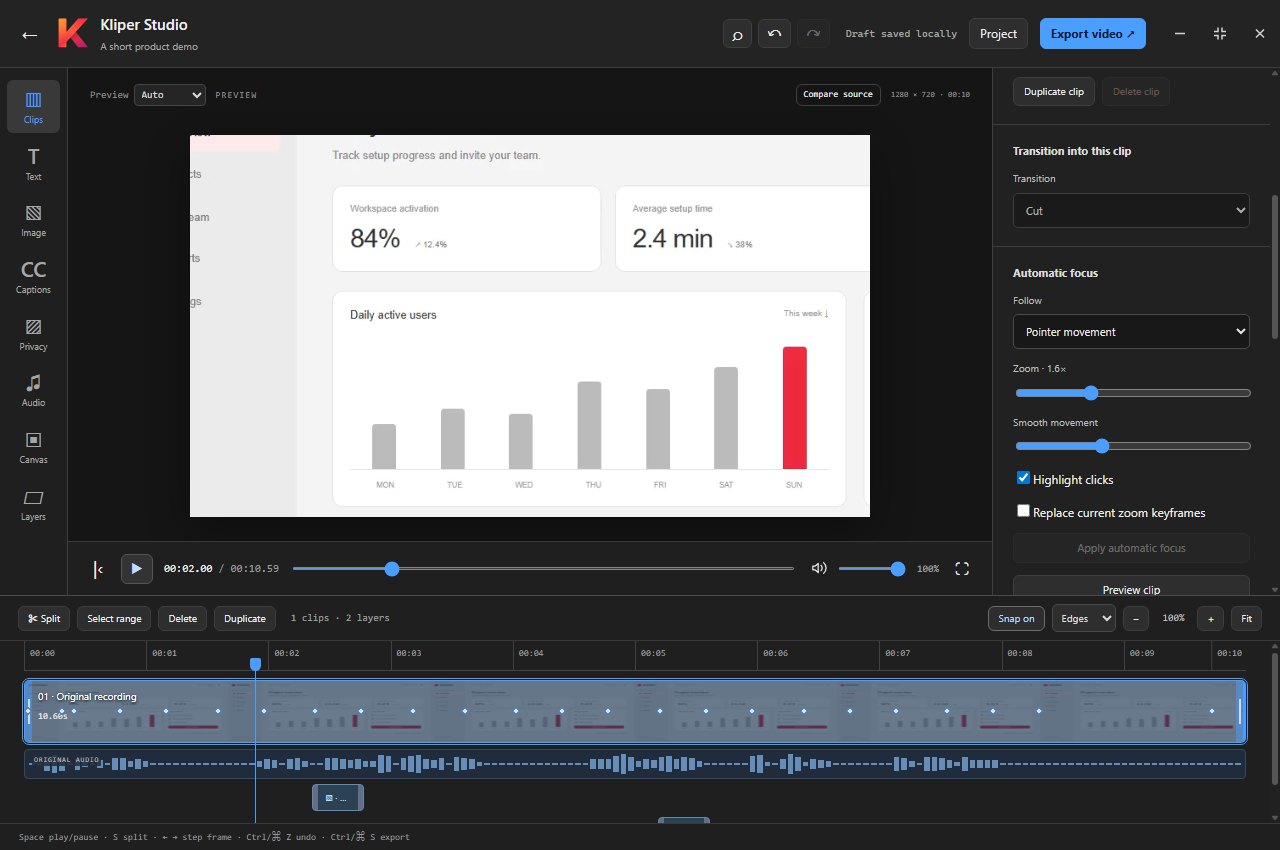
Automatic cursor focus
Create editable zooms and click highlights from pointer data saved during a full-screen recording.
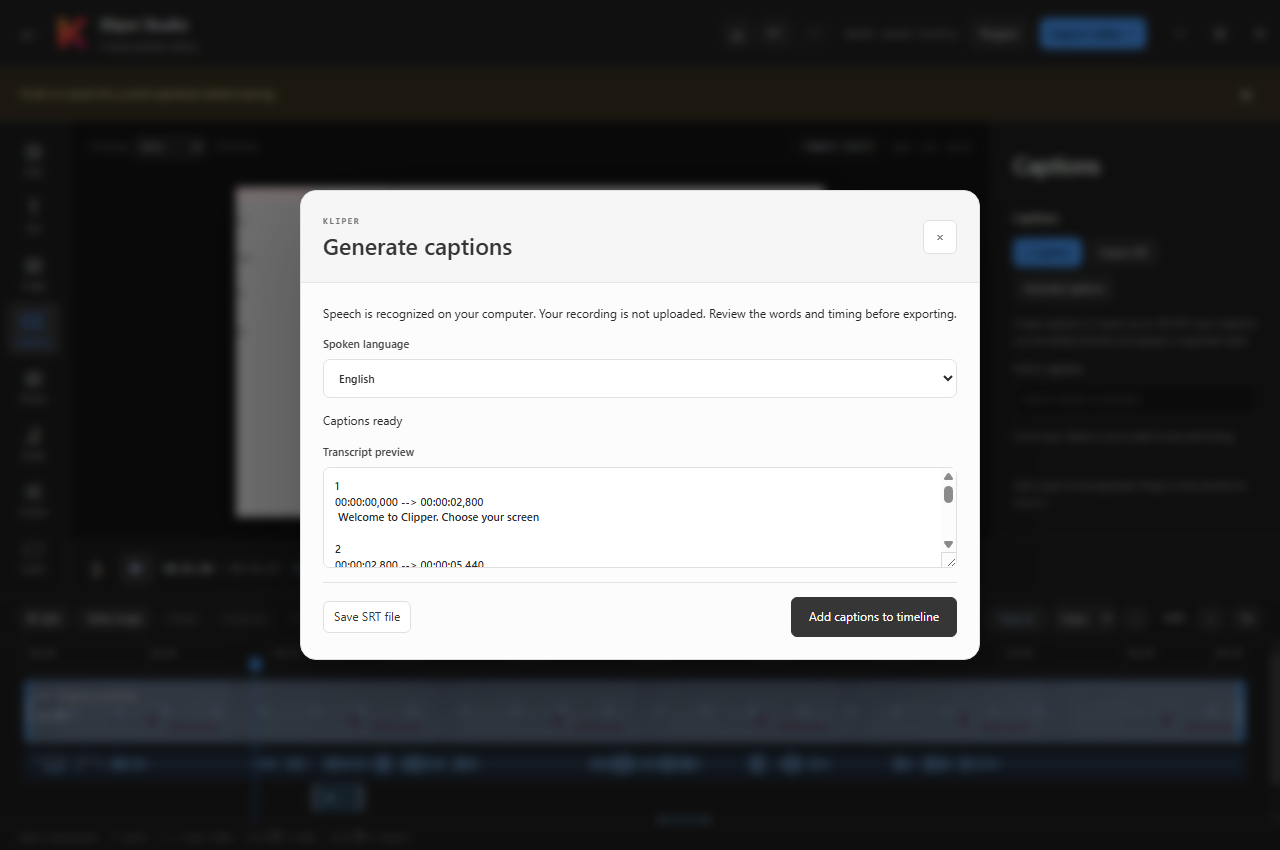
Local automatic captions
Generate a transcript on your computer, review the words, and save an SRT file or add captions.
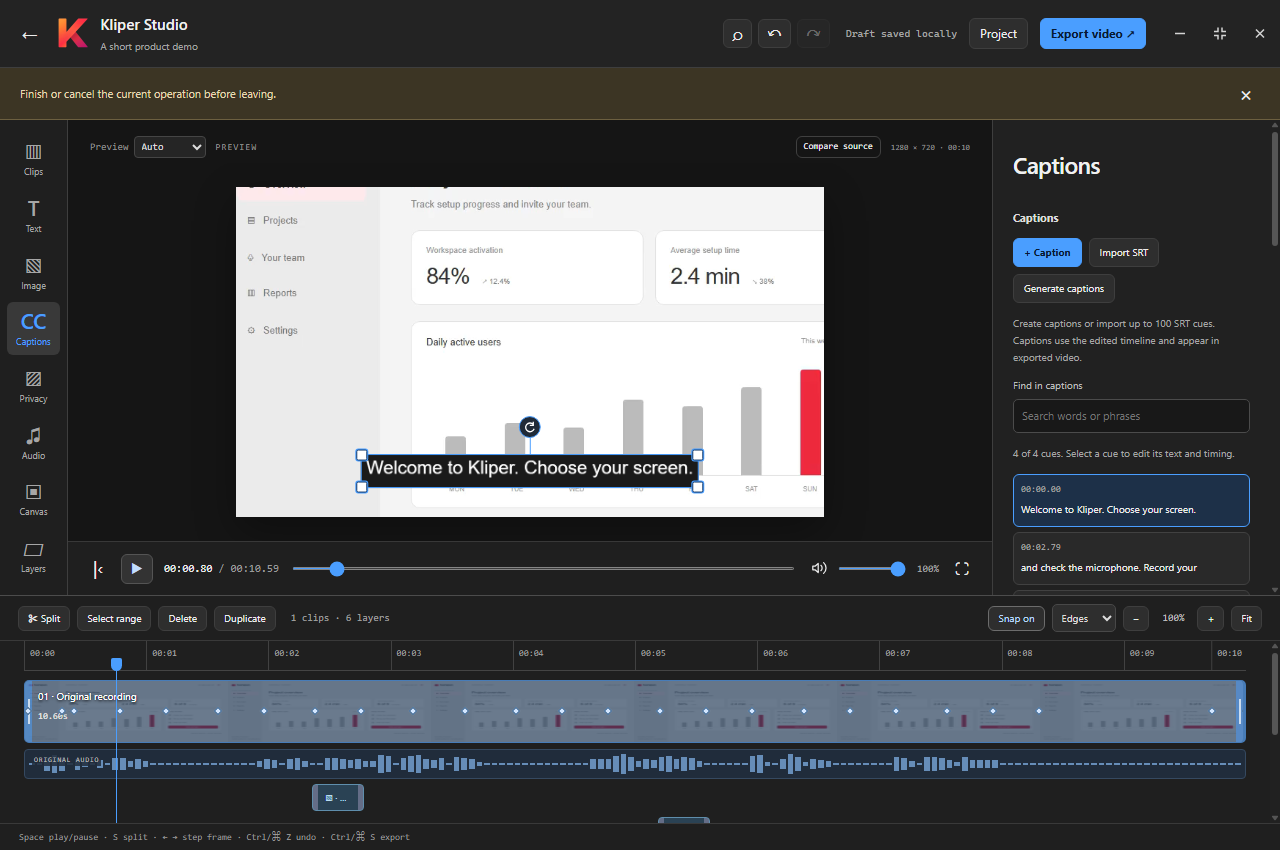
Correct a generated caption
Select a caption, fix its wording, and check it against the video.
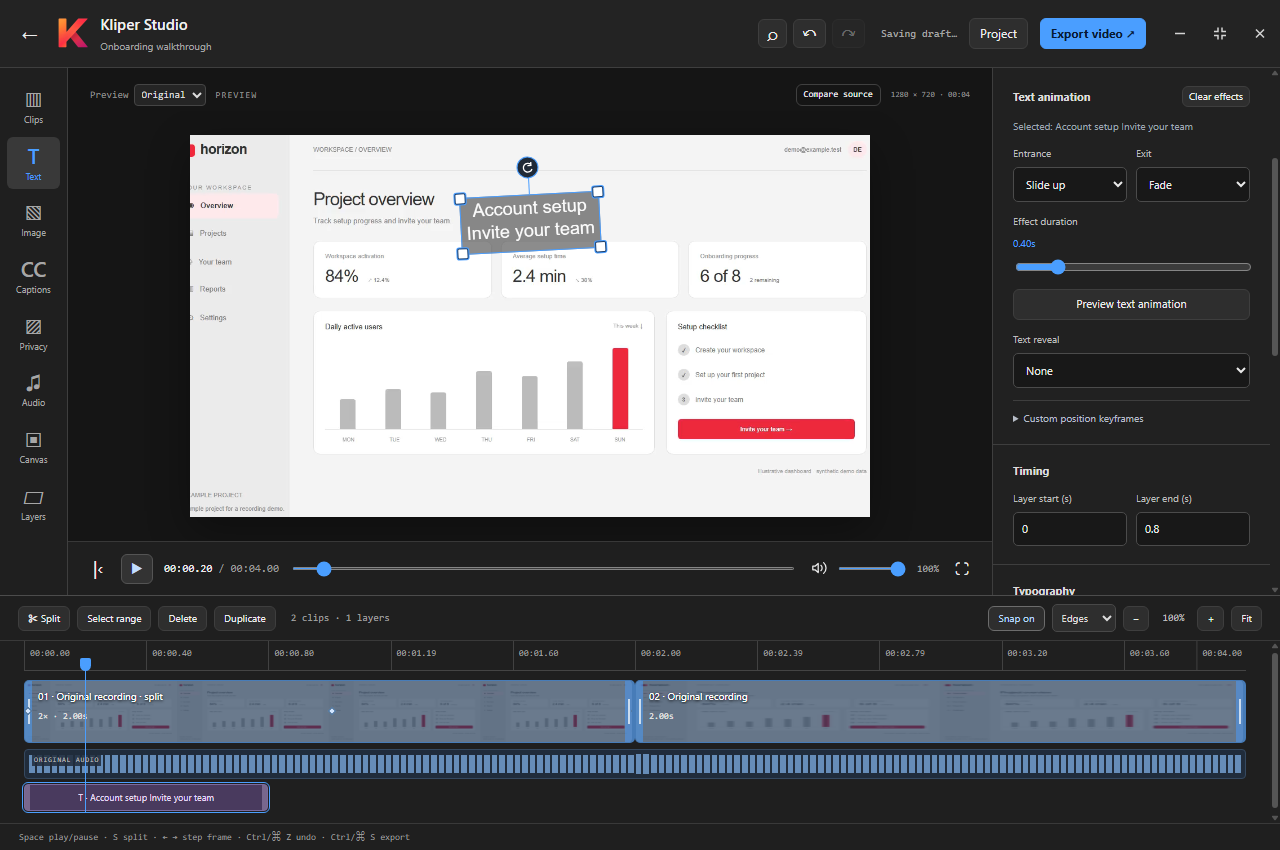
Text animation
Choose an entrance, exit, typewriter effect, or timed word highlighting for the selected text.
Before you start recording.
Details about sound, editing, files, and the free version.
Read the guides →Contact supportWhich computers does Kliper support?
Download Kliper for Windows x64, Windows ARM64, or a Mac with Apple Silicon. Computer sound recording is available on Windows; the Mac version records microphone audio.
What is free, and what does Pro add?
The free version includes recordings up to 30 minutes, screenshots, editing, captions, and local exports. Pro is $29.99 once for up to five devices. It adds longer recordings, imported image layers, hidden floating controls, and optional uploads to your YouTube or Google Drive account.
Do I need an account or an internet connection?
You can record, edit, and export without an account. Caption tools need a one-time download, then speech recognition runs on your computer. Pro activation, update checks, and optional Google uploads use the internet.
How do I record my voice and computer sound?
Turn on Microphone and choose your input. Use Test microphone before recording. On Windows, turn on Computer sound to capture other apps too. Studio lets you adjust the two recorded tracks separately.
How do automatic captions work?
Open Captions → Generate captions and set up the tools once. Choose the spoken language, generate the transcript, and review it before adding captions. Mac setup needs an installed whisper.cpp CLI. You can add up to 100 cues within the project’s 120-layer limit, or save the full SRT file.
Caption setup and editing →What is the difference between Split and Select range?
Split divides a clip at the playhead and keeps both pieces. Select range marks a section you can keep or remove. Timed layers and imported audio follow the range edit.
Does the playback volume change my exported video?
The speaker slider changes how loud Studio sounds while you edit. Use the Audio tool to change the levels included in your exported video.
Can I continue editing on another computer?
Save a .kliper project with the option to copy media. Move the project file and its assets folder together, then choose Open project in the Library. Copying the project alone will not include the video or imported files.
What happens if a recording is interrupted?
Kliper writes recording chunks to disk as you record. After restarting, check the recovery list for an unfinished recording. Recovery depends on the saved chunks being readable; keep backups of important work.
Choose your plan
Starter
Always free
-
✓
Unlimited recordings & screenshots
Up to 30 minutes per recording. As many local captures as your storage allows.
-
✓
Screen recording and local editing
Bookmarks, searchable library, video editor, and MP4 or GIF export
-
×
YouTube & Google Drive uploads
Pro feature (videos only)
-
×
Floating controls visible in screen captures
Pro
One-time payment
-
✓
Everything in Starter + image layers
Add logos and images to your edited videos, with size, position, and rotation controls
-
✓
Longer recordings and hidden controls
Record beyond 30 minutes and hide floating controls from your screen recordings
-
✓
YouTube upload
Upload videos to your YouTube account
-
✓
Google Drive upload
Upload videos to your Google Drive
-
✓
Use on 5 devices
Activate your license on up to 5 devices simultaneously
Recording guides and app comparisons.
Screen recording has no sound?
Check the microphone, computer sound, permissions, and export levels.
Read the guide → EditingCombine recordings and cut the pauses
Arrange clips, choose between splitting and removing a range, and save your edit.
Read the guide → CaptionsAdd captions to a video on your computer
Generate or import captions, correct the words, and check the timing.
Read the guide →ComparisonsKliper and Loom
Compare local editing, MP4 downloads, and team comments.
Read the comparison ? ComparisonsKliper and OBS Studio
Compare tutorial editing, scene control, and live recording.
Read the comparison ? ComparisonsKliper and Screen Studio
Compare Mac support, automatic zoom, local files, and sharing.
Read the comparison ?Record your screen.
Try Kliper for free.
Try a short recording, edit it, and save an MP4. You can use the free version without creating an account.